


How to Install WordPress: A Complete Beginner’s Guide
Accra — WordPress continues to dominate the global website market, powering more than 40% of websites worldwide. Its popularity stems from its flexibility, user-friendly interface, and vast ecosystem of themes and plugins that enable individuals and businesses to build everything from personal blogs to e-commerce stores.
Whether you’re launching a business website, portfolio, online store, or news platform, installing WordPress is the first step toward creating a professional online presence. While the process may seem technical for beginners, most web hosting providers have simplified installation, allowing users to set up a website within minutes.
Here’s a comprehensive guide to installing WordPress.
What Is WordPress?
WordPress is a free, open-source Content Management System (CMS) that allows users to create and manage websites without advanced programming skills.
It offers thousands of customizable themes and plugins that make it easy to add features such as contact forms, galleries, search engine optimization (SEO), security tools, and online shopping functionality.
Today, WordPress is used by bloggers, businesses, educational institutions, government agencies, and major international media organizations.
Check out this guide instead: https://make.wordpress.org/core/handbook/tutorials/installing-wordpress-locally/installing-xampp/
What You Need Before Installing WordPress
Before beginning the installation process, ensure you have the following:
- A domain name (such as yourwebsite.com)
- A reliable web hosting account
- Access to your hosting control panel (cPanel or similar)
- A stable internet connection
- Basic website planning, including your preferred website name and purpose
Choosing a reputable hosting provider is important because website speed, uptime, and security largely depend on your hosting environment.
Step 1: Purchase a Domain Name
Your domain name serves as your website’s online address.
When selecting a domain:
- Keep it short and memorable.
- Avoid complicated spellings.
- Use keywords relevant to your business when appropriate.
- Choose a trusted extension such as .com, .org, .net, or your country’s domain.
Many hosting companies offer a free domain for the first year with new hosting plans.
Step 2: Choose a Web Hosting Provider
Alternatively, you can experiment with WAMP, a local server setup designed specifically for Windows. Visit this link for more information: https://make.wordpress.org/core/handbook/tutorials/installing-wordpress-locally/wampserver/
Web hosting stores all of your website’s files and makes them accessible online.
For beginners, shared hosting plans are usually sufficient and affordable.
When comparing hosting providers, consider:
- Website speed
- Storage space
- SSL certificates
- Daily backups
- Customer support
- Security features
- One-click WordPress installation
As your website grows, you can upgrade to VPS, cloud, or dedicated hosting.
Step 3: Log Into Your Hosting Control Panel
After purchasing hosting, your provider will send login details for your hosting dashboard.
Most hosting companies use cPanel or a custom control panel where you can manage domains, databases, email accounts, and website installations.
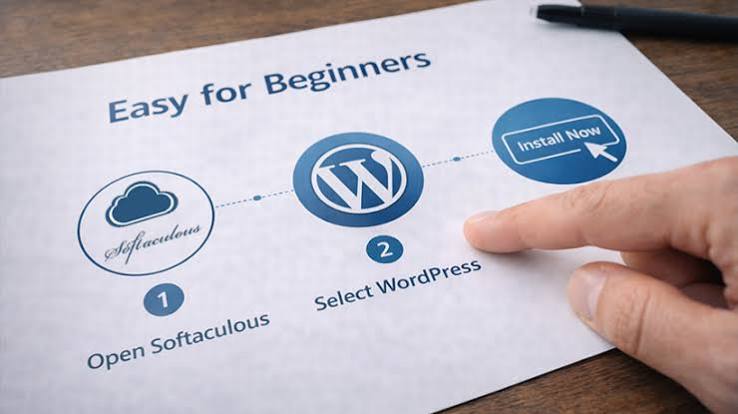
Step 4: Use One-Click WordPress Installation
Most hosting providers now include an automatic WordPress installer.
Inside your control panel:
- Locate the WordPress installer.
- Click Install WordPress.
- Choose the domain where WordPress will be installed.
- Leave the installation directory blank if you want WordPress on your main domain.
- Enter your website title.
- Create an administrator username.
- Create a strong password.
- Enter your email address.
- Click Install.
The installation usually finishes within one or two minutes.
After completion, your website becomes accessible online.
Step 5: Log Into the WordPress Dashboard
Your WordPress administration area is usually located at:
yourwebsite.com/wp-admin
Enter the username and password you created during installation.
The WordPress dashboard allows you to manage every aspect of your website, including pages, posts, media, themes, plugins, users, and settings.
Step 6: Choose a Theme
Themes determine the appearance of your website.
WordPress includes several free themes, but thousands of premium options are also available.
To install a theme:
- Open Appearance
- Select Themes
- Click Add New
- Search for a theme
- Click Install
- Click Activate
Choose a responsive theme that works well on desktops, tablets, and smartphones.
Step 7: Install Essential Plugins
Plugins extend WordPress functionality without requiring coding.
Popular plugin categories include:
- SEO
- Security
- Backups
- Contact forms
- Image optimization
- Website caching
- Spam protection
Install only plugins you actually need, as too many plugins can reduce website performance.
Step 8: Configure Basic Settings
Before publishing content, update your website settings.
Check:
- Site title
- Tagline
- Time zone
- Date format
- Permalink structure
- Reading settings
- Discussion settings
A clean permalink structure improves both user experience and search engine optimization.
Step 9: Create Essential Pages
Most websites begin with these pages:
- Home
- About Us
- Contact
- Privacy Policy
- Services
- Blog
Businesses may also create FAQ, Testimonials, Portfolio, and Pricing pages.
Step 10: Publish Your First Post
Creating content is straightforward.
Navigate to:
Posts → Add New
Enter:
- Title
- Content
- Featured image
- Categories
- Tags
After reviewing your article, click Publish.
Your content immediately becomes available to visitors.
Improve Website Security
Protecting your website should be a priority from day one.
Experts recommend:
- Using strong passwords
- Enabling two-factor authentication
- Installing security plugins
- Updating WordPress regularly
- Updating themes and plugins
- Removing unused plugins
- Performing regular backups
Keeping software updated helps protect against newly discovered vulnerabilities.
Improve Website Speed
Website speed affects user experience and search rankings.
To improve performance:
- Use quality hosting
- Compress images
- Enable caching
- Minimize unnecessary plugins
- Use a Content Delivery Network (CDN)
- Keep WordPress updated
Fast-loading websites tend to retain visitors and achieve better search engine visibility.
Optimize for Search Engines
Search engine optimization helps users discover your website.
Basic SEO practices include:
- Writing unique content
- Using descriptive page titles
- Optimizing images
- Creating internal links
- Publishing regularly
- Improving page speed
- Using SEO plugins
Consistent optimization can improve visibility in search engine results over time.
Common Installation Problems
Some beginners encounter minor issues during installation.
Common problems include:
- Database connection errors
- Incorrect file permissions
- Login difficulties
- White screen errors
- Plugin conflicts
- Theme compatibility issues
Most hosting providers offer technical support to resolve installation problems quickly.
Should Beginners Choose Manual Installation?
While WordPress can be installed manually by downloading files, creating databases, and configuring server settings, beginners generally benefit from using one-click installers.
Manual installation is more suitable for developers who require advanced configuration or custom server environments.
Final Thoughts
Installing WordPress has become easier than ever, thanks to modern web hosting services and automated installation tools. In just a few simple steps, users can launch a fully functional website ready for customization, content creation, and online growth.
Whether you’re starting a personal blog, a corporate website, an online portfolio, or an e-commerce store, WordPress provides a flexible and scalable platform that can grow with your needs. By choosing reliable hosting, keeping your website updated, and following security and optimization best practices, you can build a fast, secure, and professional website capable of serving visitors around the world.

